I use the web. A lot. So, in my surfing I often come across error pages, page not found, server not found, etc. messages. Often I find these to be very annoying. First, something has gone wrong, and since I am not going to blame myself I am going to blame your website.
Now although you, as a website owner, have little control over certain error messages that will reach your audience, such as can't reach the server (if the browser can't reach your server, there is no way your server can send a cute error message), there are pages that you can control, and by all means, control them.
This is important so I'm going to give it its own line:
Any message your users get from your site should let them know how important they are to you.
Any message, even those on your error pages, especially your error pages. Something went wrong and the user is going to assume it was your fault (I know, sometimes it really wasn't your fault, sometimes the user typed something in wrong, but they are going to assume it is your fault so just let them, remember the customer is always right).
So in the midst of telling them "oops" give them something else fun to look at (think of the fail whale or this cat)- suggest another page for them to try or simply give them another page to look at. Whatever you do, make sure it just overflows with your voice, your brand, your mission. Are you a news site? Say whoops and then include a feed of the latest or most popular news of the day. Are you a recipe site? give them a picture of a delicious chocolate cake with a link to that recipe instead. Selling something? Show them your best sellers. Make them forget that what you are giving them isn't what they thought they wanted.
Divert their attention from the fact that your site isn't quite working the way they want, and put your best foot forward.
Showing posts with label blog tips. Show all posts
Showing posts with label blog tips. Show all posts
Friday, August 21, 2009


Wednesday, April 8, 2009
Bounce Rate Breakthrough
Today I'm on jury duty, and so in my vast amount of time sitting around with (and without) my computer, I've been doing some heavy thinking.
I've come up with a theory about improving bounce rates that may revolutionize the web as I know it.
More to come.
I've come up with a theory about improving bounce rates that may revolutionize the web as I know it.
More to come.
Wednesday, July 2, 2008
Firefox Tabs Just Got Better
The day I learned about browser tabs my online experience changed for the better - new window? no need. Just Cmd T and you can open a new tab.
Last week I learned how to navigate through those tabs - and I've since become a Web browsing master.
Here are some of those tab tricks (this is for Mac users with firefox 2 - if you have firefox 3 or are using windows - check out mozilla's keyboard shortcuts page).
Move to the next tab Ctrl Tab
Move to the tab to the Right Cmd Option Right Arrow Key (Or use Ctrl Tab)
Move to the tab to the Left Cmd Option Left Arrow Key
Ever close a tab on accident? Fear no more - Cmd Shift T will reopen the last tab you closed.
Love every site you have open in your tabs? Cmd Shift D will bookmark them for you.
And, if tabbing just isn't for you - Cmd N will open a new window.
Last week I learned how to navigate through those tabs - and I've since become a Web browsing master.
Here are some of those tab tricks (this is for Mac users with firefox 2 - if you have firefox 3 or are using windows - check out mozilla's keyboard shortcuts page).
Move to the next tab Ctrl Tab
Move to the tab to the Right Cmd Option Right Arrow Key (Or use Ctrl Tab)
Move to the tab to the Left Cmd Option Left Arrow Key
Ever close a tab on accident? Fear no more - Cmd Shift T will reopen the last tab you closed.
Love every site you have open in your tabs? Cmd Shift D will bookmark them for you.
And, if tabbing just isn't for you - Cmd N will open a new window.
Friday, April 18, 2008
BloggingDulcinea - We've Got a New Blog
So - we moved our company blog to it's own site and gave it it's own identity.
Check out "Librarian of the Internet" where you'll find ramblings and insight from our writers, researchers, and whoevers about what we're finding on the web, what's going on in the New York startup scene, and other great stuff.
Here's a preview of the blog
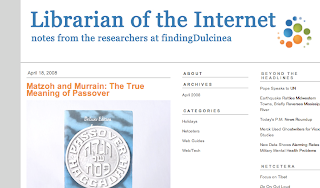
Don't worry, just because there is a new kid in town doesn't mean I'm leaving All the Write Sites - there's room in my heart for two blogs (who knows, maybe even three).
Check out "Librarian of the Internet" where you'll find ramblings and insight from our writers, researchers, and whoevers about what we're finding on the web, what's going on in the New York startup scene, and other great stuff.
Here's a preview of the blog
Don't worry, just because there is a new kid in town doesn't mean I'm leaving All the Write Sites - there's room in my heart for two blogs (who knows, maybe even three).
Wednesday, April 16, 2008
Maybe Alexa is on to Me
So - just as I'd divulged the secrets of Alexa Rank in my "improve your alexa rank without even trying" post, Alexa went ahead and changed how they rank things (pretty much meaning that they are now gathering data from more than just the alexa toolbar users).
I hope that some of you enjoyed the last few glory days of abusing the toolbar rank system, and I suppose I should have kept my big mouth shut about it (I'm sure the Alexa developers were sweating in their computer chairs as they read my blog and discovered that I'd unlocked the secret of their system).
For some of you this was probably a change in the right direction (I know for my blog it helped me break the 1 million mark - sort of a big deal) - for some it probably had no effect or minimal effect - and for a few it undoubtedly hurt your rank (and for those folks I'm truly sorry - I know that most of my self esteem is based on my alexa rank value). If you feel confused about why change happened - read Alexa's explanation, it's vague but will give you an idea of what's going on now.
Don't worry, as soon as I figure out how to improve your new alexa rank - I'll let everyone know and Alexa will have to come up with a new algorithm yet again (I had no idea I had so much clout in the internet world).
I hope that some of you enjoyed the last few glory days of abusing the toolbar rank system, and I suppose I should have kept my big mouth shut about it (I'm sure the Alexa developers were sweating in their computer chairs as they read my blog and discovered that I'd unlocked the secret of their system).
For some of you this was probably a change in the right direction (I know for my blog it helped me break the 1 million mark - sort of a big deal) - for some it probably had no effect or minimal effect - and for a few it undoubtedly hurt your rank (and for those folks I'm truly sorry - I know that most of my self esteem is based on my alexa rank value). If you feel confused about why change happened - read Alexa's explanation, it's vague but will give you an idea of what's going on now.
Don't worry, as soon as I figure out how to improve your new alexa rank - I'll let everyone know and Alexa will have to come up with a new algorithm yet again (I had no idea I had so much clout in the internet world).
Monday, April 7, 2008
Improve Your Alexa Rank - Without Really Trying
Note: The following tips will work best for smaller sites (such as this blog) with current page ranks higher than a few hundred thousand. However, they wont hurt any site (large or small) so feel free to give them a try.
In the beginning of my journey to Internet expertise, I thought that Alexa rank was the end-all of site rankings, I figured that there was some magic formula used to determine how many people were visiting a site each day - and that that magic formula (much like Google PageRank) would forever remain a mystery to me.
I was wrong.
Alexa rank is (as far as I can tell) limited to the amount of info it can gather from Alexa toolbar users, and in some cases has no real reflection of your actual rank as a site.
Don't believe me? Check out the page on Alexa that discusses how Alexa rank works.
Take special note of the following phrase from the "Some Important Disclaimers" section:
"The traffic data are based on the set of toolbars that use Alexa data, which may not be a representative sample of the global Internet population."
So - what does this mean to you and how can you use these minor flaws to the benefit of your rank?
Well, the "may not be a representative sample" bit is key. Because Alexa has to make an assumption about the number of toolbar users as a percentage of internet users as a whole - smaller sites can tip the scale in their favor.
How? Well, if Alexa assumes that one out of every 100 internet users has an Alexa toolbar (I'm just making up the numbers - but the example still works), and they get data back that says that one Alexa toobar user visited your site each day - they might assume that you get about 100 visits a day. For large sites with a broad appeal and a diverse set of users, these assumptions work just fine.
However, for a very small site (with very low traffic) the assumptions made by the Alexa technology can work in their favor. Lets say a small site gets three visitors a day, if no one that visits your site has an alexa toolbar (not even the creator) it will seem as though the site has no traffic and it will be doomed to remain on the alexa directory with no thumbnail and a horrible page rank. Now, if only one of those three visitors has the toolbar - it will seem to alexa that you have 100 visits a day (based on my made up figures from above). BUT - if all three of the users have the toolbar - it might seem as though you have 300 visitors a day. A great exaggeration from your actual traffic - and a great boost to your self-esteem.
So - for smaller sites - asking your regular userbase (your mom, your friends, etc) to add the Alexa toolbar can greatly inflate your page rank (and thus make all of your visitors super-visitors).
How quickly can you expect results? Well, the rank that you'll see on Alexa is an average of the last three months, so you wont see an immediate jump to whatever your rank is for today, but if you get your few dedicated users to keep coming back and keep using their Alexa toolbars - you'll slowly see your site creep up in rank.
For larger sites, making sure that your userbase is aware of the Alexa toolbar is never a bad idea (especially if your site tends to skew to an older or less web-savvy userbase - you may not be getting counted for all of the users you actually get simply because they aren't using the latest add-on features for their browsers).
Some added bonuses of Alexa add-ons.
If you install "sparky" you can see the Alexa rank of every site you visit and have easy access to the traffic summary pages of the sites you visit.
If everyone that reads this blog post installs an alexa toolbar or add-on, my blog may even get a boost (currently stands at around 2.7 million mark - yikes!).
In the beginning of my journey to Internet expertise, I thought that Alexa rank was the end-all of site rankings, I figured that there was some magic formula used to determine how many people were visiting a site each day - and that that magic formula (much like Google PageRank) would forever remain a mystery to me.
I was wrong.
Alexa rank is (as far as I can tell) limited to the amount of info it can gather from Alexa toolbar users, and in some cases has no real reflection of your actual rank as a site.
Don't believe me? Check out the page on Alexa that discusses how Alexa rank works.
Take special note of the following phrase from the "Some Important Disclaimers" section:
"The traffic data are based on the set of toolbars that use Alexa data, which may not be a representative sample of the global Internet population."
So - what does this mean to you and how can you use these minor flaws to the benefit of your rank?
Well, the "may not be a representative sample" bit is key. Because Alexa has to make an assumption about the number of toolbar users as a percentage of internet users as a whole - smaller sites can tip the scale in their favor.
How? Well, if Alexa assumes that one out of every 100 internet users has an Alexa toolbar (I'm just making up the numbers - but the example still works), and they get data back that says that one Alexa toobar user visited your site each day - they might assume that you get about 100 visits a day. For large sites with a broad appeal and a diverse set of users, these assumptions work just fine.
However, for a very small site (with very low traffic) the assumptions made by the Alexa technology can work in their favor. Lets say a small site gets three visitors a day, if no one that visits your site has an alexa toolbar (not even the creator) it will seem as though the site has no traffic and it will be doomed to remain on the alexa directory with no thumbnail and a horrible page rank. Now, if only one of those three visitors has the toolbar - it will seem to alexa that you have 100 visits a day (based on my made up figures from above). BUT - if all three of the users have the toolbar - it might seem as though you have 300 visitors a day. A great exaggeration from your actual traffic - and a great boost to your self-esteem.
So - for smaller sites - asking your regular userbase (your mom, your friends, etc) to add the Alexa toolbar can greatly inflate your page rank (and thus make all of your visitors super-visitors).
How quickly can you expect results? Well, the rank that you'll see on Alexa is an average of the last three months, so you wont see an immediate jump to whatever your rank is for today, but if you get your few dedicated users to keep coming back and keep using their Alexa toolbars - you'll slowly see your site creep up in rank.
For larger sites, making sure that your userbase is aware of the Alexa toolbar is never a bad idea (especially if your site tends to skew to an older or less web-savvy userbase - you may not be getting counted for all of the users you actually get simply because they aren't using the latest add-on features for their browsers).
Some added bonuses of Alexa add-ons.
If you install "sparky" you can see the Alexa rank of every site you visit and have easy access to the traffic summary pages of the sites you visit.
If everyone that reads this blog post installs an alexa toolbar or add-on, my blog may even get a boost (currently stands at around 2.7 million mark - yikes!).
Wednesday, January 23, 2008
Google Alerts: A "Fast" Way to Get Noticed
So, I've got Google Alerts set up to let me know when anyone in the blogosphere is talking about findingDulcinea.com - which makes sense because constantly searching for our site name was driving me a little crazy - and was a less than ideal way to get information.
However, I'm finding a few flaws in the Google Alerts system - specifically that the "alert" should more aptly be named "whenever we get around to letting you know."
For example, about a month ago I did a video for another site highlighting our holiday shopping guide. This was perhaps one of the worst instructional videos ever made - which my friends were happy to tell me - and we put a copy of it on YouTube.
Today - one month after the fact - I got a google alert about the video.
Now, I'm not Father Time or anything, but a month seems like an excessive amount of time for an "alert" - if I'd been waiting for an alert about something more serious - say a tornado warning or an after thanksgiving day sale - I'd be out of luck (and if I'd been in the Wizard of Oz - I'd no longer even be in Kansas).
The other (and perhaps more serious) flaw is that this "alert" has never "alerted" me to any of my own findingdulcinea - related blogging. I'm not sure if you are aware of this, but my blog has a site rank of just under 8 million (and getting better - I might add) and - if you haven't also noticed - is housed under the Google-owned Blogger.
So - okay - my blog rating is terrible (but not as bad as it could be) - but even with a bad rating - wouldn't you expect that google would search it's own family of blogs for the words for which it alerts google users? I would.
Maybe google is sending all of its alerts by old-timey horseback post mail (I was going to say telegraph but realized that even that would get to me almost immediately), maybe my blog in particular is not being searched for google alerts because of its incredible content, or maybe, just maybe, I need to find another blog alert application - any ideas?
I think I'm going to start an experiment called "how long will it take for google to find my findingdulcinea related blog posts?" and when it does maybe I will have a party. And if my alert really does arrive by old-timey horseback post, then perhaps the postman will stay for a slice of cake and some fruit punch.
Until then, we wait.
However, I'm finding a few flaws in the Google Alerts system - specifically that the "alert" should more aptly be named "whenever we get around to letting you know."
For example, about a month ago I did a video for another site highlighting our holiday shopping guide. This was perhaps one of the worst instructional videos ever made - which my friends were happy to tell me - and we put a copy of it on YouTube.
Today - one month after the fact - I got a google alert about the video.
Now, I'm not Father Time or anything, but a month seems like an excessive amount of time for an "alert" - if I'd been waiting for an alert about something more serious - say a tornado warning or an after thanksgiving day sale - I'd be out of luck (and if I'd been in the Wizard of Oz - I'd no longer even be in Kansas).
The other (and perhaps more serious) flaw is that this "alert" has never "alerted" me to any of my own findingdulcinea - related blogging. I'm not sure if you are aware of this, but my blog has a site rank of just under 8 million (and getting better - I might add) and - if you haven't also noticed - is housed under the Google-owned Blogger.
So - okay - my blog rating is terrible (but not as bad as it could be) - but even with a bad rating - wouldn't you expect that google would search it's own family of blogs for the words for which it alerts google users? I would.
Maybe google is sending all of its alerts by old-timey horseback post mail (I was going to say telegraph but realized that even that would get to me almost immediately), maybe my blog in particular is not being searched for google alerts because of its incredible content, or maybe, just maybe, I need to find another blog alert application - any ideas?
I think I'm going to start an experiment called "how long will it take for google to find my findingdulcinea related blog posts?" and when it does maybe I will have a party. And if my alert really does arrive by old-timey horseback post, then perhaps the postman will stay for a slice of cake and some fruit punch.
Until then, we wait.
Thursday, January 10, 2008
Feed You (RSS for Your Blog)
As promised, here are some quick tips for inserting an RSS feed button on your blog. Don't have a blog? Try this Guide to Blogs to read all about them or create one yourself.
Getting the Basic Feed
Create an account with FeedBurner. FeedBurner makes it super-easy to create an RSS for your blog because it prompts you to enter your blog URL on the homepage, and then steps you through finishing the "burn" of your blog. When you're finished, you should end up with an RSS page (for reference, this is mine).
If you are happy with this page, you can simply insert a link to it on your blog (say, in your blogroll or another link list).
You should also insert this link into the "feed URL" box under your "settings" tab on blogger (under the "feed setting" subheader).
Even if you already have a feed, you can still "burn" it. "Burning" will enable you to change formatting of how your feed is displayed, write a message for the readers that reach your feed page, as well as easily create fun widgets, chicklets, and other neat promotional stuff for your blog.
Getting the Code for Special Widgets, Buttons, and Other Feed Extras
If you are looking for something more flashy, say a chicklet (really just a button), you have a few options:
1. Go to the "Publicize" tab in your FeedBurner account and select "chicklet chooser" from the menu of the left.
This will give you a code to put on your blog.
2. Now, for those of you that would like to take your feed one step further (or who would like to limit the number of web sites you need to check for your blog stats), you can integrate your feed into your AddThis account.
Sign into that AddThis account that you no doubt created the other day when I showed you how to create a bookmarking button at the end of each post.
When you sign in you'll see "Get the code for my widget" near the top of the page, choose this. You'll be directed to the same page you visited when you created your bookmarking button, except this time you are going to choose "feed widget"
Enter in the RSS URL address that you got from FeedBurner (or, if you already have a feed, enter that URL), this would be the URL for a page such as this one (that I already showed you earlier).
AddThis will then generate a code for you to put into your blog.
Putting the Code in Your Blog
In blogger, you can insert this code as a "page element" (under your "settings" tab in blogger, choose "page elements" and click "add page element") - the element you want to add is "HTML/JavaScript." Copy the code given to you by FeedBurner or AddThis, give it a title (such as RSS feed) and it will show up on the right side of the blog (just like mine does).
Comparisons of AddThis verus FeedBurner
FeedBurner allows you to track how your feed is being used and if anyone is subscribing. Also, the plain old FeedBurner RSS page actually shows snippets of your blog along with the buttons with which users can subscribe. The AddThis page only shows buttons for users to choose how to subscribe to the RSS of your blog. So, although right now I have the AddThis button on my page, I might someday change to a FeedBurner chicklet instead, because I like users to have a sample of my actual RSS available so they know what they are signing up for.
AddThis allows you to track the subscriptions to your blog, this tracking is not as detailed as the tracking from FeedBurner, but the benefit is that you can check these stats at the same time as your Bookmarking stats, so you get the benefit of two sets of data on one account.
Also, from what I can tell so far, because my AddThis button uses my FeedBurner URL, both sites track data for me - so I can check both to see how my blog is doing.
Getting the Basic Feed
Create an account with FeedBurner. FeedBurner makes it super-easy to create an RSS for your blog because it prompts you to enter your blog URL on the homepage, and then steps you through finishing the "burn" of your blog. When you're finished, you should end up with an RSS page (for reference, this is mine).
If you are happy with this page, you can simply insert a link to it on your blog (say, in your blogroll or another link list).
You should also insert this link into the "feed URL" box under your "settings" tab on blogger (under the "feed setting" subheader).
Even if you already have a feed, you can still "burn" it. "Burning" will enable you to change formatting of how your feed is displayed, write a message for the readers that reach your feed page, as well as easily create fun widgets, chicklets, and other neat promotional stuff for your blog.
Getting the Code for Special Widgets, Buttons, and Other Feed Extras
If you are looking for something more flashy, say a chicklet (really just a button), you have a few options:
1. Go to the "Publicize" tab in your FeedBurner account and select "chicklet chooser" from the menu of the left.
This will give you a code to put on your blog.
2. Now, for those of you that would like to take your feed one step further (or who would like to limit the number of web sites you need to check for your blog stats), you can integrate your feed into your AddThis account.
Sign into that AddThis account that you no doubt created the other day when I showed you how to create a bookmarking button at the end of each post.
When you sign in you'll see "Get the code for my widget" near the top of the page, choose this. You'll be directed to the same page you visited when you created your bookmarking button, except this time you are going to choose "feed widget"
Enter in the RSS URL address that you got from FeedBurner (or, if you already have a feed, enter that URL), this would be the URL for a page such as this one (that I already showed you earlier).
AddThis will then generate a code for you to put into your blog.
Putting the Code in Your Blog
In blogger, you can insert this code as a "page element" (under your "settings" tab in blogger, choose "page elements" and click "add page element") - the element you want to add is "HTML/JavaScript." Copy the code given to you by FeedBurner or AddThis, give it a title (such as RSS feed) and it will show up on the right side of the blog (just like mine does).
Comparisons of AddThis verus FeedBurner
FeedBurner allows you to track how your feed is being used and if anyone is subscribing. Also, the plain old FeedBurner RSS page actually shows snippets of your blog along with the buttons with which users can subscribe. The AddThis page only shows buttons for users to choose how to subscribe to the RSS of your blog. So, although right now I have the AddThis button on my page, I might someday change to a FeedBurner chicklet instead, because I like users to have a sample of my actual RSS available so they know what they are signing up for.
AddThis allows you to track the subscriptions to your blog, this tracking is not as detailed as the tracking from FeedBurner, but the benefit is that you can check these stats at the same time as your Bookmarking stats, so you get the benefit of two sets of data on one account.
Also, from what I can tell so far, because my AddThis button uses my FeedBurner URL, both sites track data for me - so I can check both to see how my blog is doing.
Wednesday, January 9, 2008
Feed Me (RSS)
Yes - it is finally here. Really Simple Syndication for All the Write Sites (and because I used FeedBurner it really was really simple).
If you prefer to see the XML so that you can put the feed in your Live Bookmarks, I've got that too.
Today you should click on the "Subscribe" button on the right to get your own feed of my blog because . . .
. . . tomorrow I will show you how to add it to your own blog.
If you prefer to see the XML so that you can put the feed in your Live Bookmarks, I've got that too.
Today you should click on the "Subscribe" button on the right to get your own feed of my blog because . . .
. . . tomorrow I will show you how to add it to your own blog.
Blog Add-ons 101
I've been playing around with this blog template for a few days and while, yes, it still looks like a plain old blogger template, I've added a couple very simple add ons to enhance my blogging experience. Today, I'm going to reveal the secret of one of these tools, tomorrow I'll give you tips for the other (if I were a magician, I would be blacklisted for this).
1. "Add This" - You might have noticed that fancy button at the bottom of each blog post, this is my attempt to strongly encourage readers to bookmark this blog (or this blog post) on a variety of social bookmarking tools. I can see how many times that button has been used to tag my blog posts and to what social bookmarking sites (but don't worry, i can't see who did it or when - this isn't 1983 - not yet anyhow).
But how did I do it? Am I some HTML genius? One quick chat with our coding experts at the office would let you know that, no, I am not. I just followed these easy steps.
Go to AddThis and create a free account, then generate the code for the button you want (the site will step you through that and you can choose the look of the button as well as what blogging platform you use).
The following step should work for AddThis as well as for any other bookmarking, or other, little button that you want to appear at the footer of your post.
To insert the code into your posts, edit your template and select "edit HTML" - here you'll see a bunch of code - the easiest way (on a Mac) to look for the code you want is to hit Apple and "F" key. This will create a little pop-up window at the bottom of your screen. The code that you are looking for is
<div class='post-footer'>
Once you've found that line of code, simply copy (Apple and "C") and paste (Apple and "V") the code from AddThis (or whatever tool you used) right after that line of code.
Viola! You should see the button the next time you publish a post. Now all you have to do is sit back and wait for the traffic to come in.
And, if you're hungry for more Webby stuff, try this Web Technology guide.
1. "Add This" - You might have noticed that fancy button at the bottom of each blog post, this is my attempt to strongly encourage readers to bookmark this blog (or this blog post) on a variety of social bookmarking tools. I can see how many times that button has been used to tag my blog posts and to what social bookmarking sites (but don't worry, i can't see who did it or when - this isn't 1983 - not yet anyhow).
But how did I do it? Am I some HTML genius? One quick chat with our coding experts at the office would let you know that, no, I am not. I just followed these easy steps.
Go to AddThis and create a free account, then generate the code for the button you want (the site will step you through that and you can choose the look of the button as well as what blogging platform you use).
The following step should work for AddThis as well as for any other bookmarking, or other, little button that you want to appear at the footer of your post.
To insert the code into your posts, edit your template and select "edit HTML" - here you'll see a bunch of code - the easiest way (on a Mac) to look for the code you want is to hit Apple and "F" key. This will create a little pop-up window at the bottom of your screen. The code that you are looking for is
<div class='post-footer'>
Once you've found that line of code, simply copy (Apple and "C") and paste (Apple and "V") the code from AddThis (or whatever tool you used) right after that line of code.
Viola! You should see the button the next time you publish a post. Now all you have to do is sit back and wait for the traffic to come in.
And, if you're hungry for more Webby stuff, try this Web Technology guide.
Subscribe to:
Posts (Atom)

